 Seth0x41
Introduction
Most developers, when building an application, plan every step for performance and write good, clean code. However, they often overlook the security aspect, which can lead to critical bugs affecting the entire system, such as Remote Code Execution, SQL Injections, Local File Inclusion, etc. It's a fact that no system or code is completely safe. In this article, we will try to reduce attacks on our application using WAF (Web Application Firewall).
What is Web Application Firewalls ?
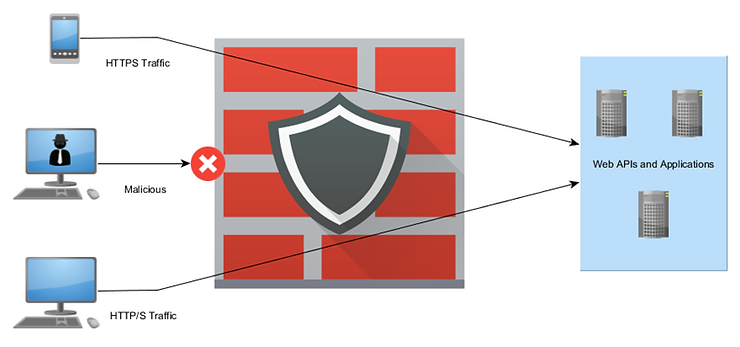
A Web Application Firewall (WAF) is software designed to monitor and analyze incoming requests to your application. The way the firewall identifies malicious requests can vary, some use regular expressions, while others rely on threat signatures, machine learning models, etc.
Once the firewall identifies a malicious request, it makes a decision whether to forward or drop the request based on predefined rules.
WAF Operation Mode
WAF has 3 main modes works in:
1 - Learning mode:
In this mode, the WAF monitors the traffic but does not drop the request. Instead, it learns from the normal behavior of the application to better understand and identify malicious patterns over time.
2 - Active mode:
In this mode, the WAF actively monitors traffic and enforces policies, such as alerting or logging when it identifies malicious behavior. Additionally, it takes the proactive step of dropping any malicious requests.
3 - Passive mode (Simulation):
In this mode, the WAF monitors the traffic and alerts when it detects malicious behavior but doesn't drop the request. This mode is commonly used in banking systems and sensitive businesses where blocking an interaction with the application by mistake is not acceptable. Instead, it notifies the system admin to take manual action regarding such requests. It is recommended to use this mode when your WAF is in Learning mode if it's available.
WAF Providers
Many companies offer paid Web Application Firewalls, including big names like Cloudflare, AWS, Imperva, Akamai, F5, and Azure WAF, etc.
On the open-source side, you'll find options like ModSecurity, Coraza, Open-appsec, Shadow Daemon, and more.
Small-Mid companies and Side projects
Given the high cost of WAFs for side projects and small to mid-sized companies, the optimal choice to increase the security of your application is using open-source WAF. In this article, we will install ModSecurity Firewall with the Nginx server and configure it with the OWASP ModSecurity Core Rule Set.
ModSecurity Firewall
NOTE : ModSecurity's Custodianship Transfers from Trustwave to OWASP in 25 JAN 2024.
ModSecurity is an open source and cross platform web application firewall. The first version released in November 2002 which make it the first web application firewall in the internet.
ModSecurity operates as an application layer firewall, it can be configured to monitor and filter HTTP traffic between a web application and the internet.
ModSecurity Phases
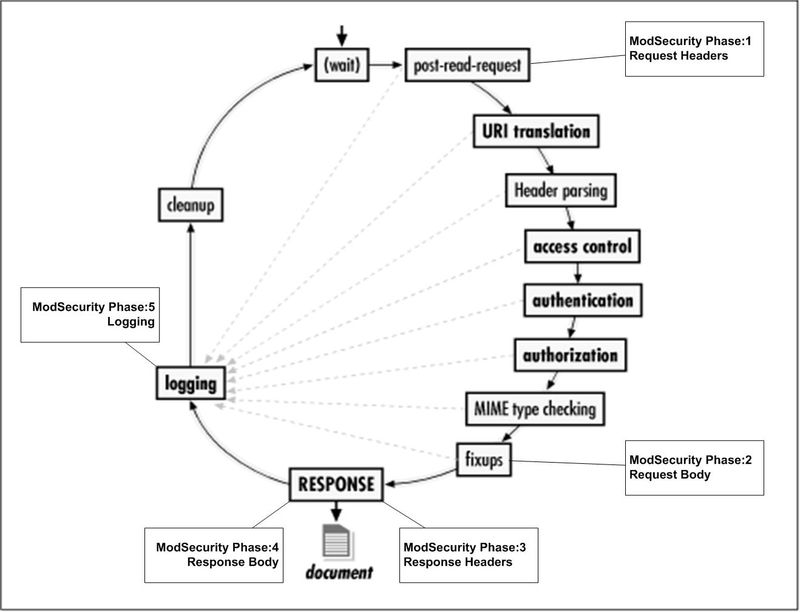
ModSecurity performing 5 phases to handle incoming requests based in it's rules.
Phase 1: Request Header (REQUEST_HEADERS)
This is the initial stage in processing an HTTP request. Rules in this phase focus on reading and analyzing the request headers to determine if they contain any malicious patterns before your web server starts processing the request arguments. Here's a deeper dive into what happens:
First, the web server receives an HTTP request from the client (your browser, for instance) and parses it. Then, ModSecurity takes a copy of all parsed request headers, including common ones like User-Agent, Referer, Content-Type, etc., and starts evaluating the pre-configured rules against the available headers.
ModSecurity focuses on two main areas in the Request Headers phase:
-
Security checks: It starts searching for suspicious patterns in headers that might indicate an attack, as defined in the rule set, such as specific characters or keywords often used in SQL injection attempts within custom headers.
-
Access control: It begins restricting access based on specific header values, like blocking bots based on specific User-Agent values or denying access based on specific referrer URLs.
If a rule matches and triggers an action, ModSecurity can take various steps depending on the rule configuration.
Phase 2: Request Body (REQUEST_BODY)
After processing the header, ModSecurity gains access to the request body content at this stage and starts to analyze and check the request content itself. This allows ModSecurity to identify common use cases such as:
- Detecting malicious payloads: By searching for patterns indicative of attacks like SQL injection, cross-site scripting (XSS), Local File Inclusion, etc.
- Validating data: By ensuring that the data format aligns with expectations, for example, checking if uploaded files are of the allowed type.
- Content inspection: By performing deeper analysis based on the content type, for example, scanning uploaded images for hidden malicious code.
ModSecurity offers various body processing engines to handle different formats of encoding techniques such as: URLENCODED: For transferring form data.MULTIPART: For file transfers.XML: For XML data.JSON: For JSON data.
The appropriate engine might be chosen based on the Content-Type header from Phase 1 to ensure proper decoding.
Similar to Phase 1, if a rule matches and triggers an action, ModSecurity can take various steps depending on the rule configuration.
Phase 3: Response Headers (RESPONSE_HEADERS)
In this phase, ModSecurity inspects the response headers coming from the web server. It occurs after the server has processed the request and generated the response. Once the web server generates the response, ModSecurity analyzes the headers before they are sent back to the client, including:
- Content-Type
- The name and version of the web server
- Cache-Control and etc.
Similar to Phase 1 with request headers, ModSecurity focuses on two main areas in the response Headers phase:
- Security Checks: This involves checking and identifying potential leaked security vulnerabilities in the response headers, such as server information disclosure, etc.
- Response Manipulation: This involves modifying response headers to increase security, such as adding security-related headers like
X-Frame-Optionsto prevent clickjacking attacks, and removing sensitive information from headers that might not be necessary for the client.
Similar to previous phases, if a rule matches and triggers an action, ModSecurity can take various steps depending on the rule configuration.
Phase 4: Response Body (RESPONSE_BODY)
Similar to phase 2, ModSecurity analyzes the response body, although it's somewhat limited in this phase because the server has already processed the request and generated the response. However, it remains useful in certain cases, such as:
- Rules can detect sensitive leaked data by the application in the response body, such as IDs and error messages containing sensitive details.
- In specific scenarios, rules might modify the response body content for security purposes. For instance, they could sanitize certain characters to prevent reflected XSS attacks.
As in previous phases, the rule engine evaluates pre-configured rules against the parsed response body content. If a rule detects leaked information, it can trigger actions such as:
- Blocking the response from being sent (rare).
- Logging the issue for further investigation.
- Modifying the response body content to remove sensitive data or sanitize it.
Phase 5: Logging (LOGGING)
This is the last stage in ModSecurity's five-phase processing cycle. Unlike previous phases that directly interacted with request/response data, Phase 5 deals with the logs generated by the web server. These logs typically contain information about every request processed by the server, including the client IP address, request method, requested URL, user agent, etc.
There are many logging rules, and here are some common examples:
- Failed Login Attempts: Repeated login attempts from a single IP address within a short timeframe.
- 404 Not Found Errors: A surge in requests for non-existent files, which could be a sign of automated attacks like directory fuzzing.
- Specific HTTP Status Codes: Focusing on requests that resulted in uncommon status codes (e.g., 403 Forbidden, 500 Internal Server Error) for further investigation.
When a logging rule identifies a suspicious event, ModSecurity can take various actions:
- Writing to Custom Log Files: ModSecurity can create separate log files specifically for security events, allowing for easier filtering and analysis.
- Enriching Web Server Logs: It can add additional information to existing web server logs, such as details about triggered rules or matched patterns.
- Sending Alerts: In some configurations, ModSecurity might even trigger alerts or notifications to security personnel for critical events.
Install Modsecurity with NGINX
In this section, we will install ModSecurity with Nginx as the web server, and use the OWASP ModSecurity Core Rule Set on an Ubuntu server. Note: ModSecurity is not officially supported by NGINX, but the ModSecurity team has created a connector.
First, let's update our machine to make sure we have all the latest repositories.
sudo apt update && sudo apt upgrade
After a successful update and upgrade, let's install NGINX.
sudo apt install nginx
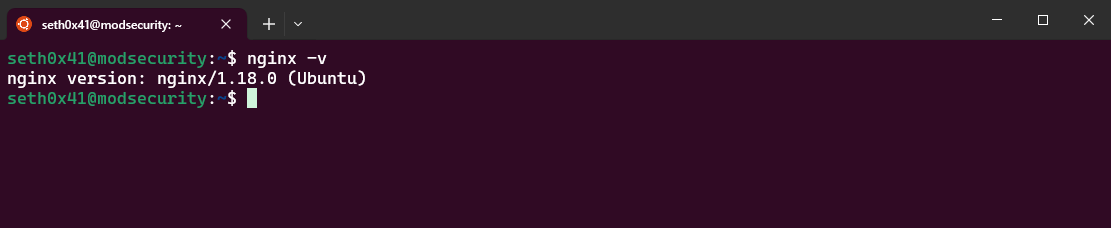
Let's check if Nginx has been successfully installed by checking its version.
nginx -v
Compile and Install ModSecurity
We need to install all the dependencies required for the build and compilation process of ModSecurity.
sudo apt-get install bison build-essential ca-certificates curl dh-autoreconf doxygen flex gawk git iputils-ping libcurl4-gnutls-dev libexpat1-dev libgeoip-dev liblmdb-dev libpcre3-dev libpcre++-dev libssl-dev libtool libxml2 libxml2-dev libyajl-dev locales liblua5.3-dev pkg-config wget zlib1g-dev zlibc libxslt-dev libgd-dev

Then we should clone ModSecurity and compile it.
cd /opt && sudo git clone https://github.com/owasp-modsecurity/ModSecurity.git
Let's initialize and update submodules.
sudo git submodule init
sudo git submodule update
Now the build process can begin.
cd ModSecurity/
sudo ./build.sh

Configure the environment.
sudo ./configure

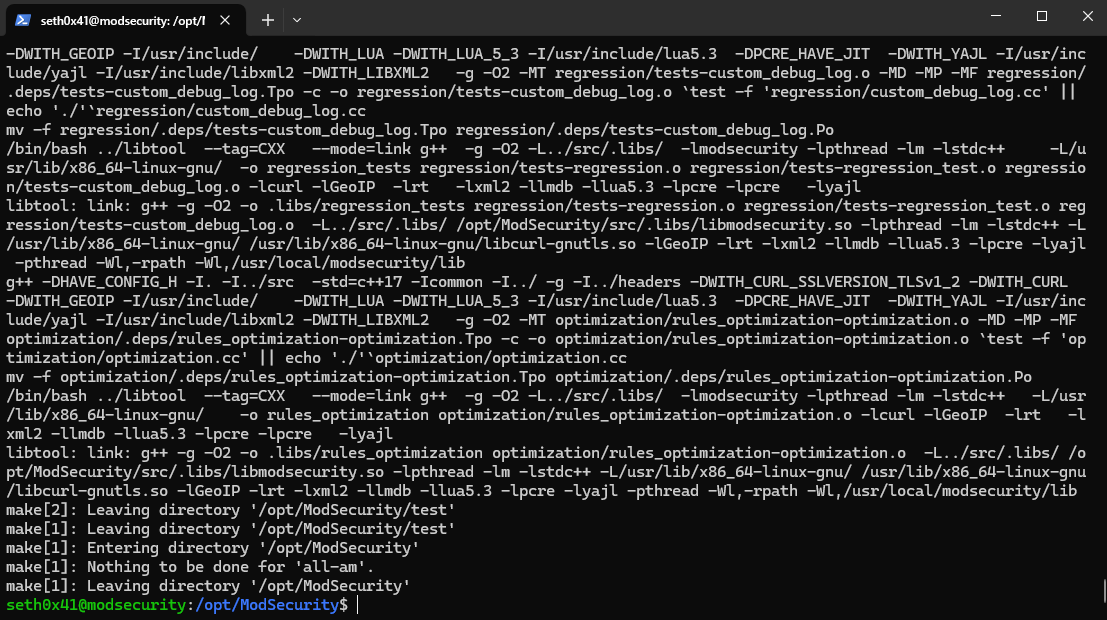
Then the final step for building ModSecurity will take a few minutes.
sudo make
Now, after successful compilation, let's proceed to install ModSecurity.
sudo make install

Install ModSecurity-Nginx Connector
First, we will clone the ModSecurity-Nginx connector from GitHub.
cd /opt && sudo git clone https://github.com/owasp-modsecurity/ModSecurity-nginx.git
Then, we need to compile the ModSecurity module with the same version of Nginx installed on our machine.
nginx -v
Now, we will download the exact version.
cd /opt && sudo wget http://nginx.org/download/nginx-{version}.tar.gz
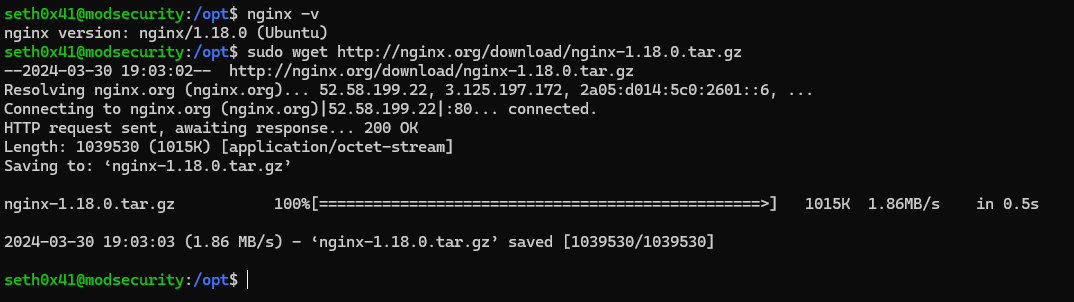
After the download is complete, extract the tar file.
sudo tar -xzvf nginx-1.18.0.tar.gz
We must set up the environment for NGINX first. Once completed, it will provide us with all the necessary modules, such as the NGINX ModSecurity Module.
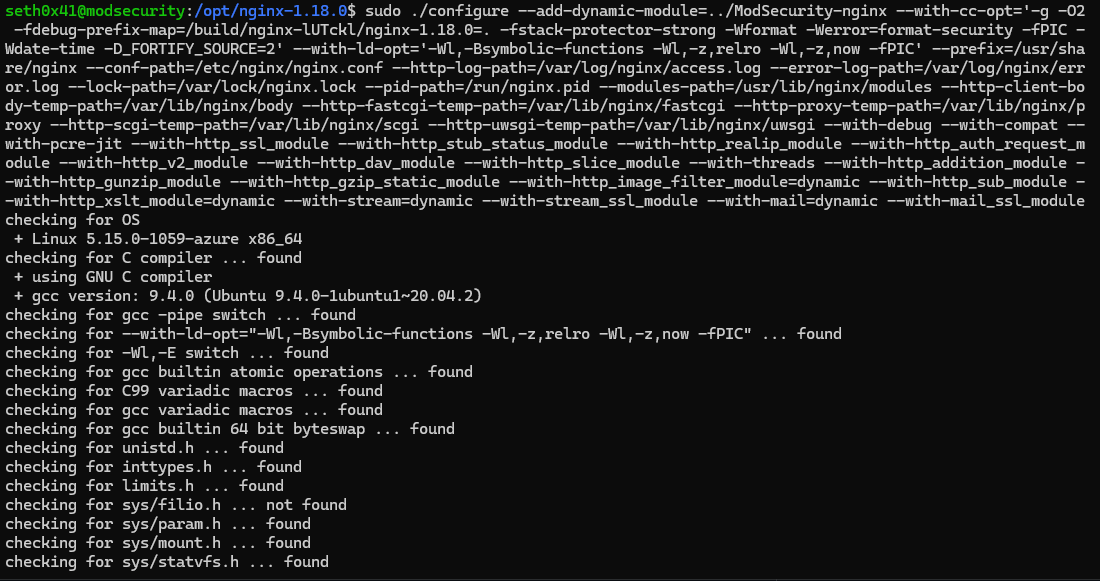
To accomplish this, we need to execute the configure command. Before doing so, we must specify certain arguments, particularly opting for the ModSecurity-Connector in this instance.
However, one crucial argument needed is the precise compilation arguments and dependencies utilized for this version of NGINX (1.18.0 in my instance).
nginx -V
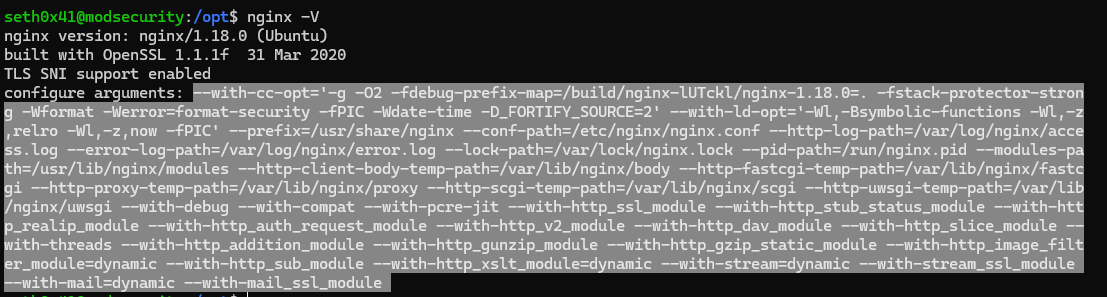
Copy your configure arguments and then add them to the next command
cd nginx-1.18.0/ && sudo ./configure --add-dynamic-module=../ModSecurity-nginx {Configure Arguments}
We can now proceed to type make modules, initiating the module compilation process.
sudo make modules
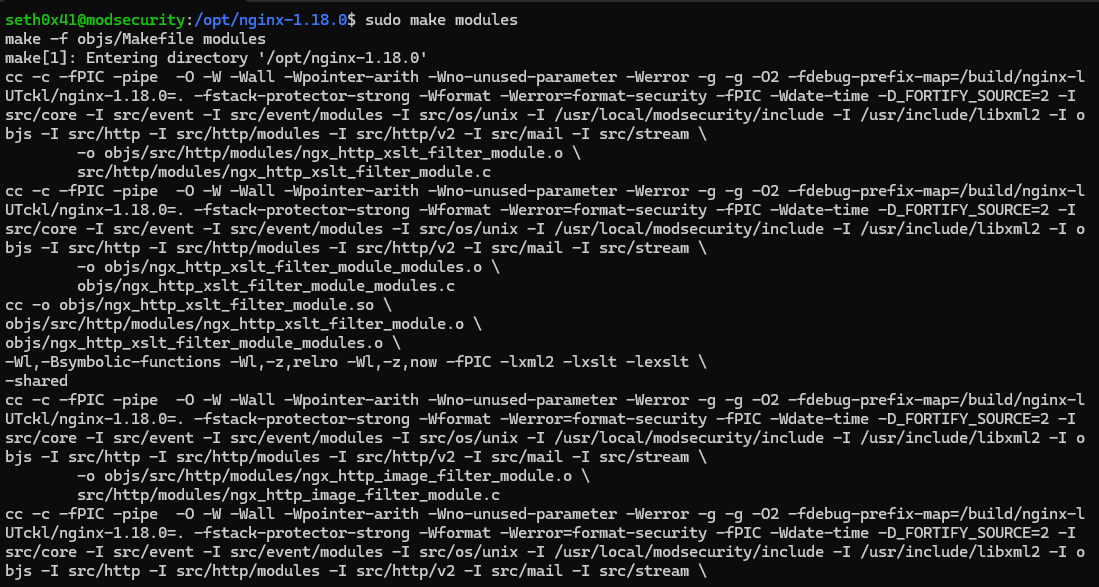
Now, it's necessary to copy the modules created for NGINX. This specific module will facilitate the connection between ModSecurity and NGINX. We can find modules in the /objs directory. First, we need to create a module directory inside /etc/nginx to copy the module within it.
sudo mkdir /etc/nginx/modules
Then copy the objs/ngx_http_modsecurity_module.so module to the NGINX modules directory.
sudo cp objs/ngx_http_modsecurity_module.so /etc/nginx/modules/ngx_http_modsecurity_module.so
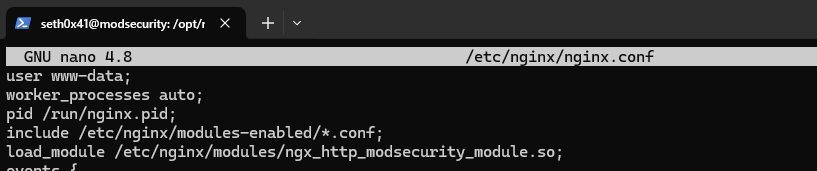
Now let's load the ModSecurity module into the NGINX configuration file.
sudo nano /etc/nginx/nginx.conf
Now let's check if the NGINX configuration syntax is valid or not.
sudo nginx -t

Now that ModSecurity is ready to use, let's configure it with the OWASP Core Rule Set:
OWASP Core Rule Set
Let's clone the repository as modsecurity-crs.
cd /opt && sudo git clone https://github.com/coreruleset/coreruleset.git modsecurity-crs
Now, we need to rename the setup configuration from crs-setup.conf.example to crs-setup.conf.
cd modsecurity-crs && sudo mv crs-setup.conf.example crs-setup.conf
Once this is completed, we need to modify certain rules to ensure functionality, such as REQUEST EXCLUSION RULES.
sudo mv rules/REQUEST-900-EXCLUSION-RULES-BEFORE-CRS.conf.example rules/REQUEST-900-EXCLUSION-RULES-BEFORE-CRS.conf

Now, we're going to move the modsecurity-crs to usr/local.
cd /opt && sudo mv modsecurity-crs /usr/local
Finally, we can move on to configuring ModSecurity. We can start this by creating a folder inside /etc/nginx named modsec.
sudo mkdir /etc/nginx/modsec
Now, we have to copy a few configuration files to this directory from the default ModSecurity GitHub repo to the /etc/nginx/modsec directory.
sudo cp /opt/ModSecurity/unicode.mapping /etc/nginx/modsec/
cd /opt/ModSecurity && sudo mv modsecurity.conf-recommended modsecurity.conf
sudo cp modsecurity.conf /etc/nginx/modsec
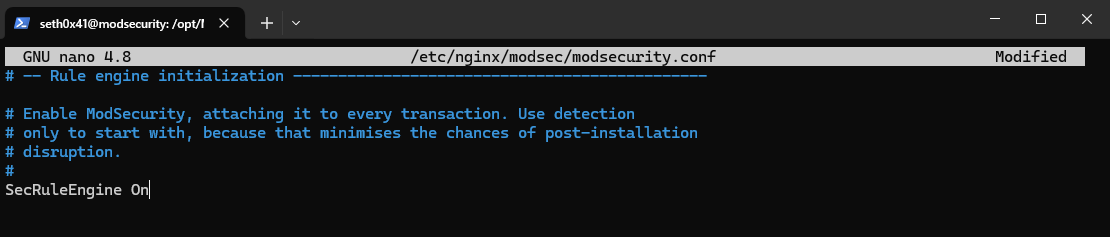
Now, let's edit some configurations in modsecurity.conf to turn the rule engine on.
sudo nano /etc/nginx/modsec/modsecurity.conf
And then set SecRuleEngine from DetectionOnly to On.
SecRuleEngine On
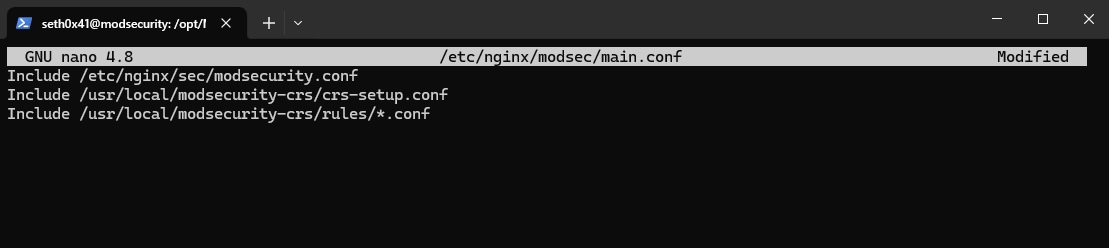
Now we need to include the main configuration file for the previous configurations and the core rule set.
sudo nano /etc/nginx/modsec/main.conf
Then add
Include /etc/nginx/sec/modsecurity.conf
Include /usr/local/modsecurity-crs/crs-setup.conf
Include /usr/local/modsecurity-crs/rules/*.conf
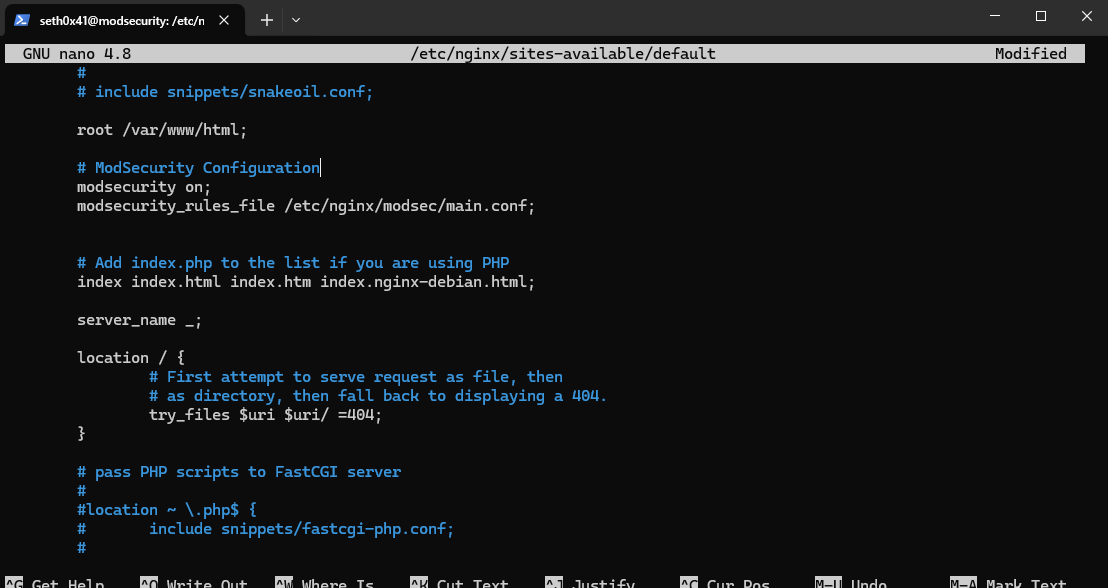
And we have successfully created our configuration. The final step is to activate all of this by including modsecurity_rules_file and enabling ModSecurity in the NGINX configuration.
sudo nano /etc/nginx/sites-available/default
Then add
modsecurity on;
modsecurity_rules_file /etc/nginx/modsec/main.conf;
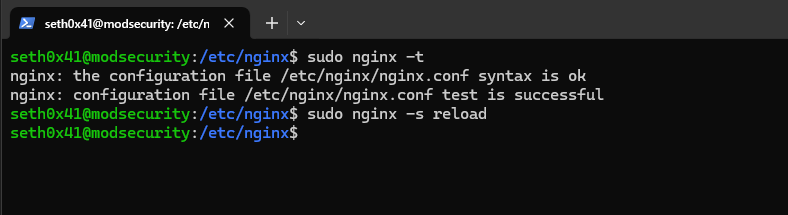
Now let's check if there are any NGINX configuration errors, and if not, we will restart NGINX.
sudo nginx -t
sudo nginx -s reload
Overview of what we did
- Compiling Modules: We compiled the necessary modules required for our setup.
- Installing ModSecurity: ModSecurity was compiled and installed independently, not yet integrated with NGINX. To accomplish this, we utilized the NGINX connector to build our modules.
- Copying ModSecurity Module: Once compiled, we obtained the ModSecurity module and copied it into the
/etc/nginx/modules/directory. This directory serves as a location for NGINX to store additional modules. - Creating Configuration Files: We created our configuration files under the
/etc/nginx/modsec/directory. Within this directory, two key files were created:- ModSecurity Configuration File: This file contains configuration settings specific to ModSecurity, such as rule sets and directives.
- Main Configuration File: This serves as the primary configuration file for NGINX. It's responsible for loading additional configuration files, including the ModSecurity configuration file, and the core rule set as necessary.
- Activate and include ModSecurity rules to Nginx
Testing our WAF
We will test our WAF with a vulnerable PHP web application. I will use this one. First, we will disable ModSecurity from the NGINX configuration and reload NGINX.
sudo nano /etc/nginx/sites-available/default

Now, reload.
sudo nginx -s reload
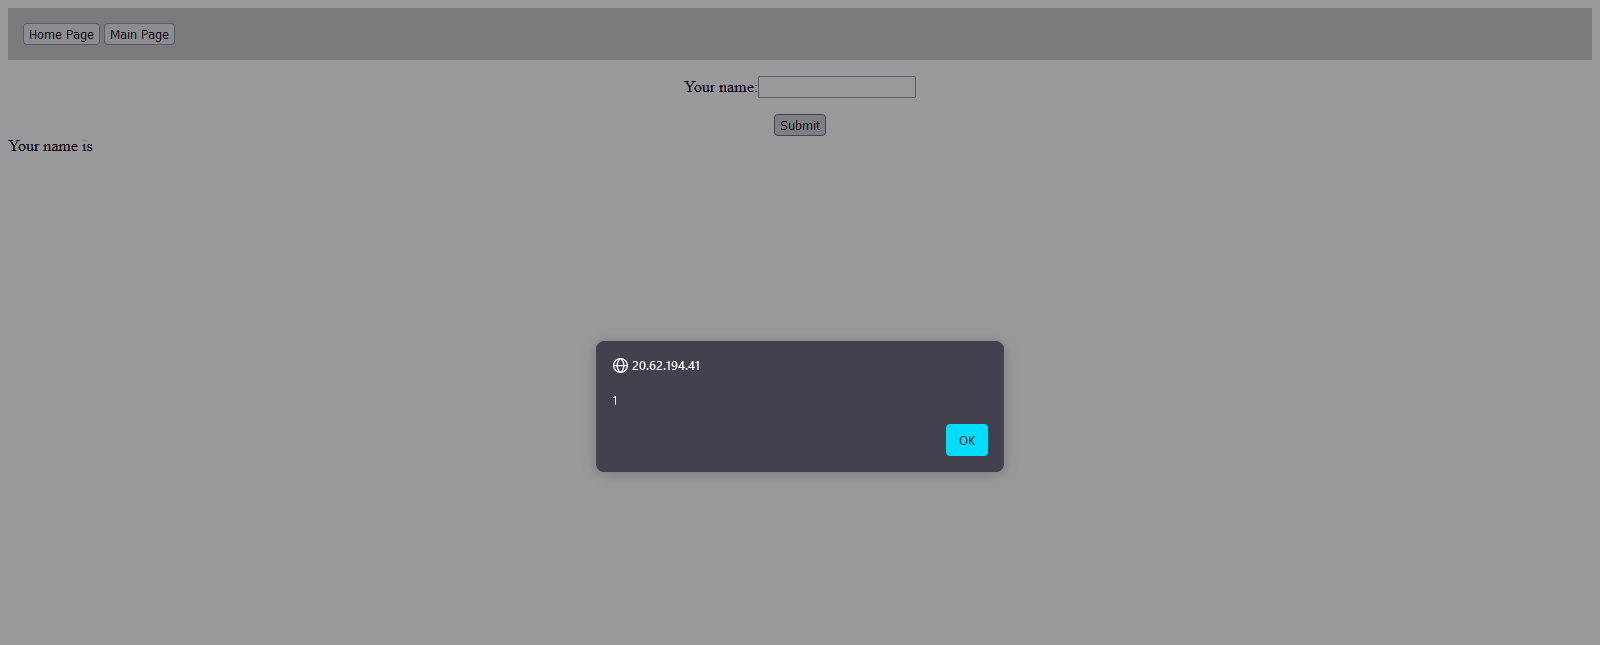
Let's try a simple XSS payload in this input field.
<img src=x onerror=alert(1)>

And as expected, it's executed.
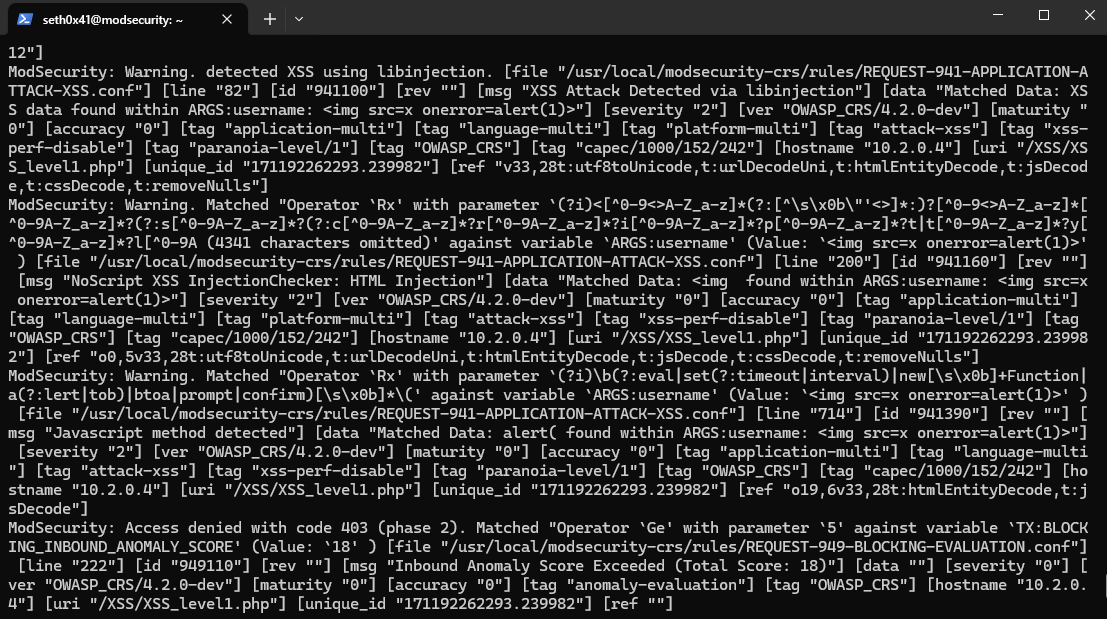
Now let's turn on ModSecurity, restart NGINX, and try again.

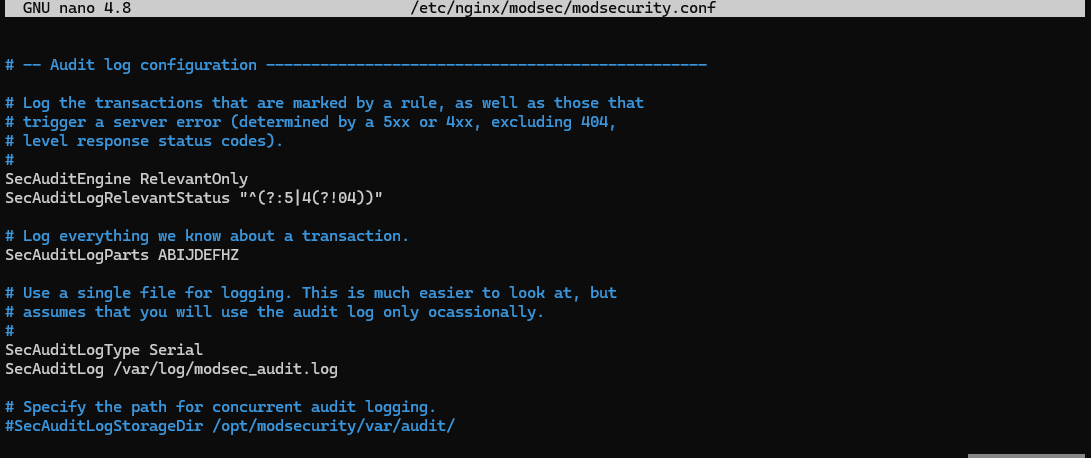
ModSecurity blocked the request. You can find ModSecurity logs at /var/log/modsec_audit.log
You can configure it from /etc/nginx/modsec/modsecurity.conf.
For more information about logging and debugging, check this article.
Now, your WAF is ready to protect your app. Thank you for reading! If you have any further questions or need assistance, feel free to ask.
Reference
Home · owasp-modsecurity/ModSecurity Wiki (github.com)\
Processing phases of Modsecurity (malware.expert)\
Nginx ModSecurity Tutorial | Nginx WAF\
Securing NGINX Server Using ModSecurity OSWAF | codelogicx (medium.com)\
Library: ModSecurity Handbook: Getting Started | Feisty Duck